Showing posts with label UBUNTU. Show all posts
Dec 29, 2010 | By: tOk aKi mOiN

How To Install Ubuntu Themes

One of the first things I did when I moved from Window 7 to Ubuntu was install a nice looking theme. The default Ubuntu theme is pretty decent, but I dont like the brown and when browsing posts like this and this, I knew I wanted a sexier look for my laptop.
I haven’t messed around with themes too much yet, but I can show you how to find and install themes. I would definitely recommend you change your default Ubuntu fonts as well. So lets begin.

Where To Find Ubuntu Themes

There are a number of websites which have free Ubuntu themes for download. One of those sites that I really enjoy and get most of my themes from is Gnome-Look.org. Gnome-Look offers tons of free themes, wallpapers and icons for download. I am assuming you are using gnome as your window manager. If you are, then browse under the GTK 2 themes. Choose a theme and then we will install it below.
Quick note: If you are using apps developed with the QT library (generally KDE apps) then your GTK theme will not be applied to them. You will have to try find a matching QT theme for your theming to be consistent. A nice website for KDE themes is the sister site of Gnome-Look called KDE-Look.

Installing The Theme

Now that you have the theme downloaded, we need to install it. This is a very simple process:
Firstly, goto system > preferences > appearance

Ubuntu Appearance Preferences

Then, click install…
Now, browse for your theme (It should be a tar.gz file), click open and then click apply new theme.

Apply New Ubuntu Theme

And thats all there is to it. Go crazy and install as many as you want until you have the perfect theme ......
Dec 28, 2010 | By: tOk aKi mOiN

Installing Software in Ubuntu

Introduction
Most Windows users who migrate to Ubuntu end up confused about software installation. They go to a website, download a .tar.gz file, double-click it, and don't see a Next-Next-Next-Finish wizard. This tutorial is intended to introduce you to the preferred methods of software installation in Ubuntu.
Rather than leaving it up to the user to track down installer files and keep applications updated, Ubuntu (like many other Linux distributions) has a software package management system that provides a searchable database of easily installable applications (like an online shopping cart but the software is cost-free), which it will download and install for you with a few clicks.
For those of you with smartphones, it's a very similar process to installing applications using the iTunes App Store or Android Market.
 
Installing 101: Ubuntu Software Center

The best place to start with this package management process is to use a simple interface for it called Ubuntu Software Center. (The Software Center is available as of Ubuntu 9.10; in Ubuntu 8.04, there was a similar interface called Add/Remove.)

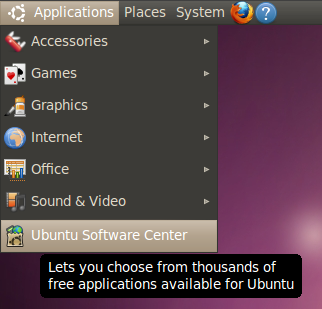
Go to Applications and select Ubuntu Software Center.


If you already know what software you're looking for, you can begin typing the name of it in the top-right corner to begin the filtering process. If you don't know, you can also browse by category.
In this case, let's say you're looking for an audio recording and editing program called Audacity.
So after filtering it, click Install and get prompted to authenticate with your password.


Then after a few seconds, Audacity is downloaded and installed.


Once it's finished installing, it's ready for you to use.
Manual download: .deb
Most of the time, if you need software, you can use the Software Center to install it from the online repositories. Sometimes, software is not available in the repositories, and you have to go to a website to download it. If you are able to download a file with a .deb extension, this is the software package format Ubuntu prefers.


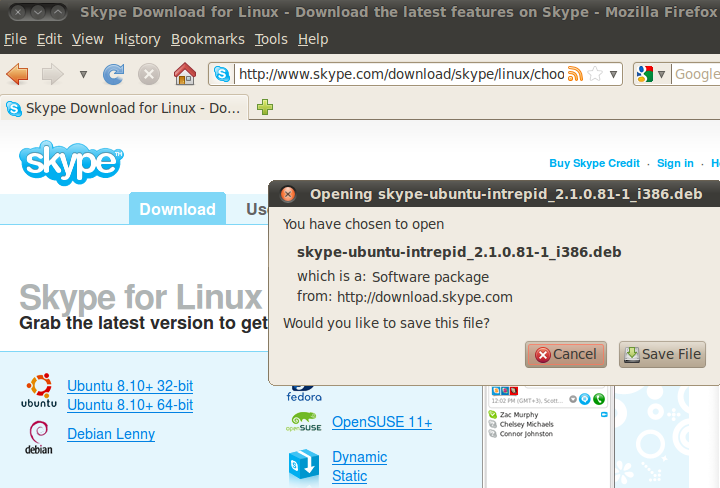
For example, Skype is not in the default Ubuntu repositories, so you can go to the Skype website, and download the Ubuntu package.
Note: Skype doesn't always update their Ubuntu packages. So, for example, in this screenshot Skype lists the installer file as being for Ubuntu 8.10+, but I'm using Ubuntu 10.04. Opera, on the other hand, even if it hasn't changed its browser version numbers will have all the Ubuntu release versions to choose from. I don't even think Google Chrome has version numbers, just separate 32-bit and 64-bit .deb files for Ubuntu. Try to select whichever version seems most appropriate. If you have questions, post a thread on the Ubuntu Forums.


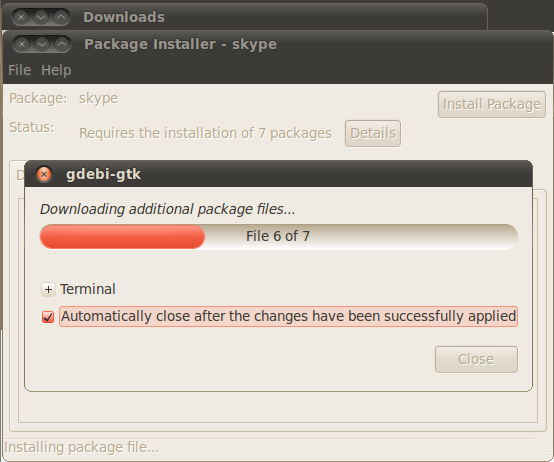
Once the .deb file has finished downloading, double-click it to install it. You'll be prompted for your password. Go ahead and enter it if you trust the source you downloaded the file from.


After GDebi (that's the name of the graphical tool that installs .deb files manually) finishes...


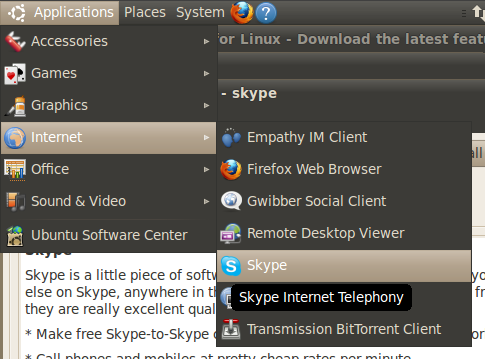
... your application should be ready to use.
Note: as of Ubuntu 10.10 (Maverick Meerkat), double-clicking a .deb file now opens it in Ubuntu Software Center instead of GDebi. The process is still the same, though (just double-click the file).
Last resorts: .rpm and .tar.gz
The preferred way to install software in Ubuntu is to use the package manager, which you can access through Ubuntu Software Center. As we've seen with Skype, sometimes you can also find a .deb for software not in the repositories. But what if you can't find a .deb?
.rpm
If you can't find a .deb, you can try a .rpm. These files are packaged for other Linux distributions (usually Fedora or Mandriva), but there is an application called alien (which you can install using Synaptic) that allows you (most of the time) to convert .rpm files to .deb. Read more about this process.
.tar.gz
As a last resort, you can download a .tar.gz file. The .tar.gz file extension indicates the file is a compressed set of files and folders (the compressed files you see in Windows usually have a .zip extension). If you see the .tar.gz, it could be compressed files that have a precompiled binary file, or it could be compressed files that have the source code allowing you to compile the application from source.
If you have trouble installing a .tar.gz file, you can ask for help on the Ubuntu Forums.
Links
There are other guides out there that help you understand software installation a bit better.
  • Community Documentation on Installing: The wiki gives a thorough explanation of the process of installing software and also includes the Adept package manager available in Kubuntu.
  • Video tutorials: A collection of YouTube videos showing the installation process in real-time, often with spoken narration.
  • Old Psychocats Tutorial: A very text-heavy explanation of software installation that also includes examples with the command-line way to access the package manager.
Advanced interface: Synaptic Package Manager
I have removed instructions for Synaptic, because I think Ubuntu Software Center is better for beginners, and it's become robust and functional enough so that only those who actually prefer Synaptic really need to know about it. If you are curious about Synaptic, though, I have step-by-step instructions for how to use it on an older version of this page.
Dec 22, 2010 | By: tOk aKi mOiN

UBUNTU theme screenshot with great conky...


How to install Ubuntu : The Ubuntu 10.10 Installation Guide (install Ubuntu on your full drive)

Installing Ubuntu

Notes

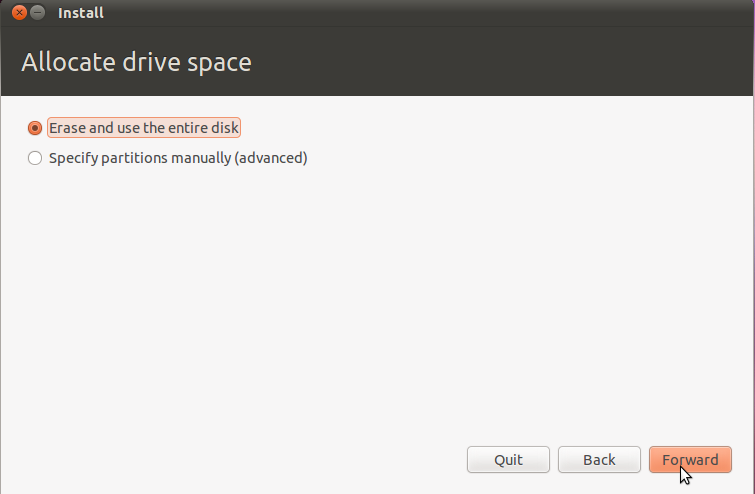
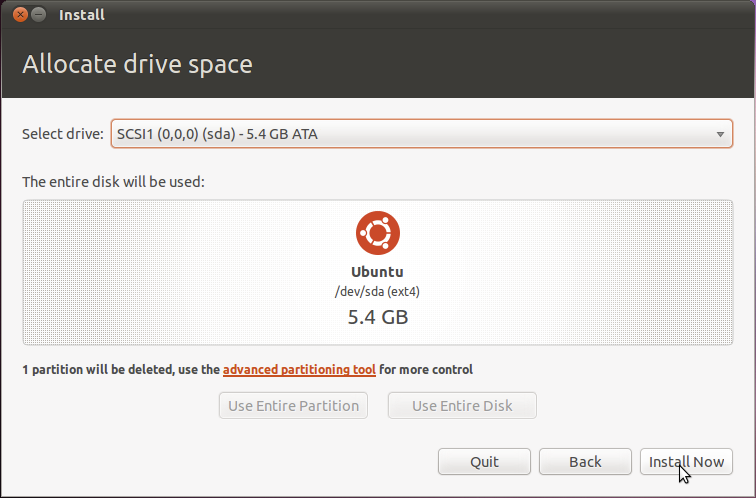
This tutorial assumes you definitely want to install Ubuntu on your full drive and erase Windows completely. Unless you are absolutely sure you want to erase Windows, do not follow this tutorial.
Instead, I would recommend you start migrating to open source Windows applications in Windows, playing around with Ubuntu virtually inside Windows, and then use a dual-boot between Ubuntu and Windows.
If you are using Mac OS X, the community documentation may help you out here.
This tutorial features Ubuntu 10.10 (Maverick Meerkat). Ubuntu 10.04 (Lucid Lynx) has a slightly different installer. More details here.

Installing Ubuntu

Now that you have the Desktop CD, you'll need to reboot your computer to use Ubuntu.
Your computer's BIOS must be set to boot from CD first; otherwise, Windows will just load up again. To get into the BIOS settings, you usually have to press one of these keys during boot-up: Escape, F1, F2, F12, or Delete. Usually your computer will tell you which key to use.


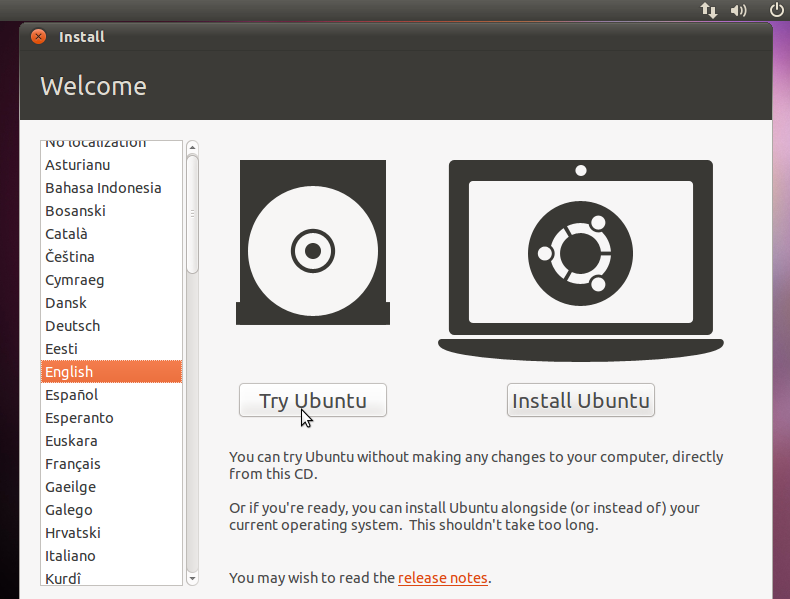
Once your BIOS is configured to boot from CD first, if you have Ubuntu in the drive, you should see this screen. Ubuntu will take a couple of minutes to load up. Just be patient.


Select your preferred language.
If you have at least 512 MB of RAM, you may want to select Try Ubuntu, as it will allow you to do other things (check your email, browse the web) while you're installing Ubuntu.
If you have only 256 MB or 384 MB of RAM, you should select Install Ubuntu. This will give you the same installation screens you see below, but you won't have the rest of the Ubuntu live session running as well.
If you have less than 256 MB of RAM, you should use the Alternate CD to install Ubuntu, or do a barebones installation.


If you choose to install Ubuntu directly, the installer will launch immediately. If you choose the Try Ubuntu option, you'll be in the Ubuntu live session. From there, click the Install Ubuntu icon on the desktop.


Select your language.


There is a new option in the Ubuntu 10.10 installer that asks if you want to install closed source third-party software for MP3 playback and Flash, for example. I would strongly suggest—unless you know who Richard Stallman is—that you check (or tick) this option.


This tutorial assumes you want to install a single-boot of Ubuntu—this will erase everything on your current drive. If you're interested in keeping Windows and dual-booting with Ubuntu, the safest dual-boot is probably with Wubi, unless you know what you're doing (in which case you shouldn't be looking at this guide).


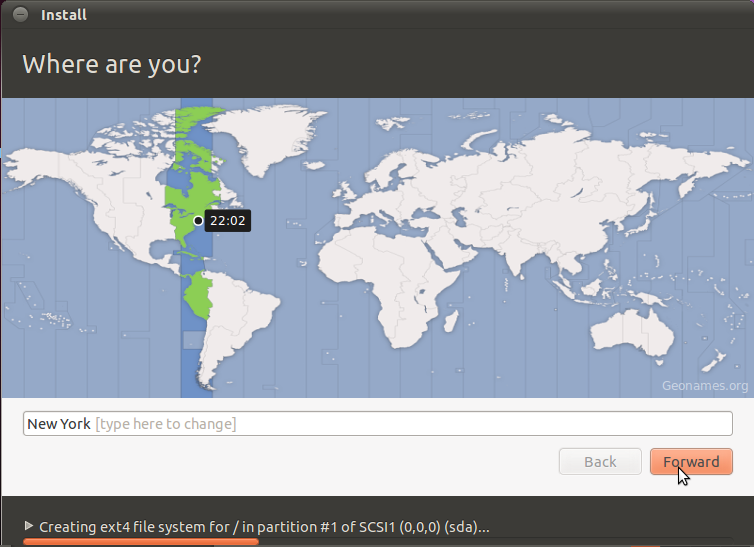
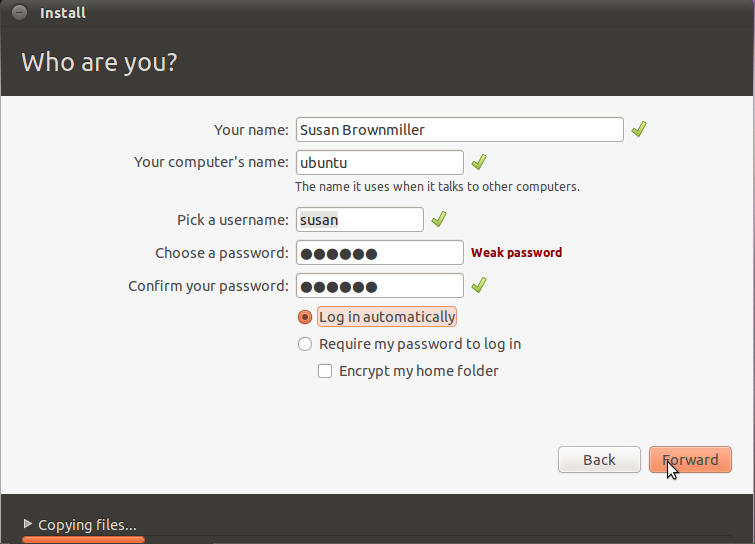
Answer the simple questions. They're pretty self-explanatory.
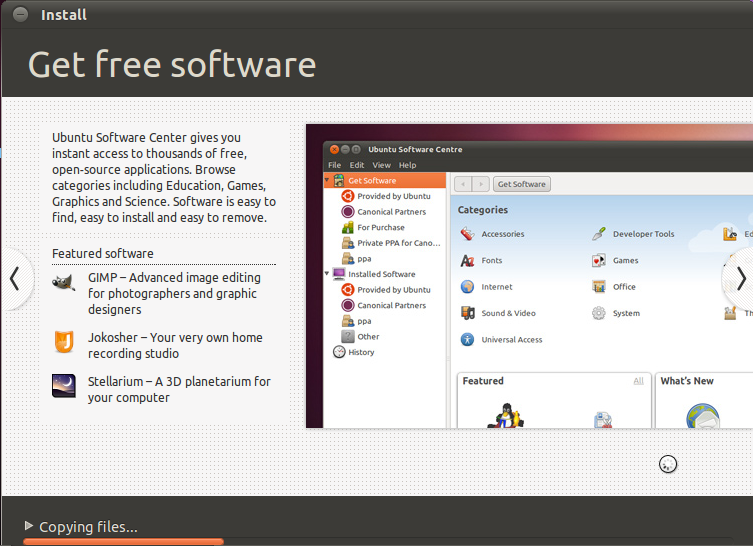
Then wait for Ubuntu to install.


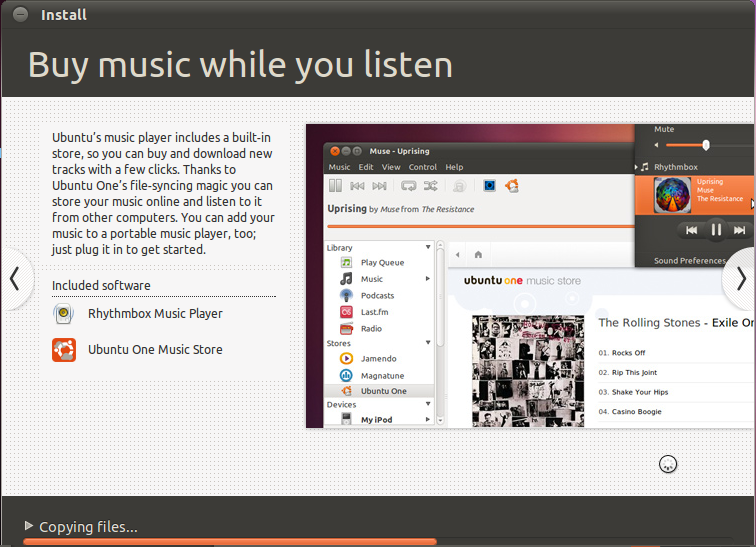
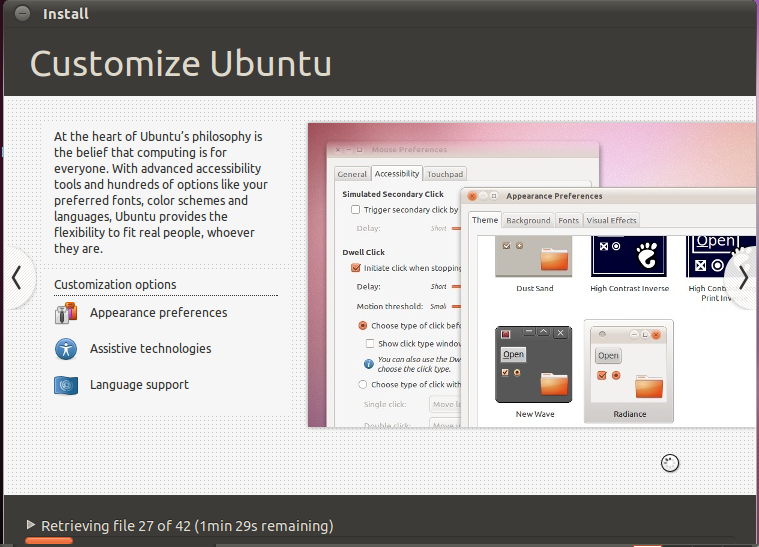
While Ubuntu installs, you'll see a slideshow introducing you to its features.


Eventually, the installation will finish (the whole thing can take anywhere between 15 minutes and an hour, depending on the speed of your computer). You can either Continue Testing if you want to shutdown your computer or Restart Now if you want to restart your computer.


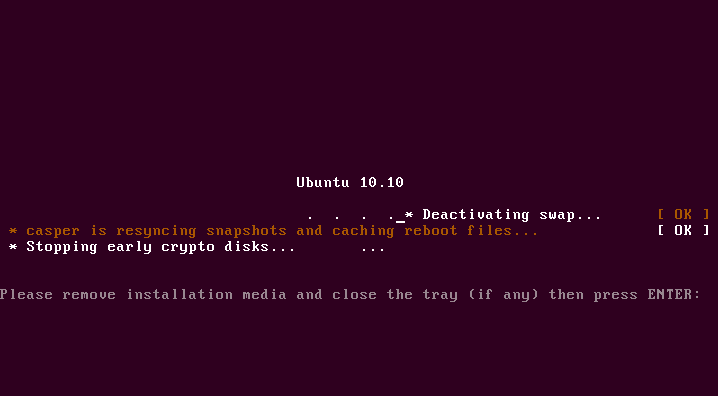
Either way, Ubuntu will eject your CD (or prompt you for when to remove your USB stick, if you used UNetBootIn instead of a CD burning program). The next time you boot up, you should have a working Ubuntu installation!
Dec 20, 2010 | By: tOk aKi mOiN

aPaKaH UBUNTU...?

Ubuntu adalah sebuah Sistem Pengoperasian lengkap berasaskan Linux yang sesuai untuk komputer riba (Notebook), Komputer peribadi (Desktop) dan komputer pelayan (server). Ia boleh digunakan secara bebas dan percuma di rumah, di pejabat, di sekolah dan lain-lain. Ubuntu mengandungi pelbagai aplikasi seperti pemproses perkataan, pembaca email, perisian pelayan rangkaian dan alat-alat pengaturcaraan.

Ubuntu adalah percuma dan sentiasa akan percuma dengan sumber terbuka. Anda boleh memuat turun Ubuntu dan dikongsi bersama rakan-rakan dan musuh anda tanpa perlu membayar lesen penggunaan seperti Windows. Selain itu sistem operasi Ubuntu yang berasaskan Linux juga sangat kebal dan anda tidak perlu menggunakan perisian Anti-Virus untuk mempertahankan sistem komputer anda.

Ubuntu akan mengeluarkan versi terbaru sistem operasinya setiap 6 bulan yang akan mengandungi teknologi, kreativiti dan inovasi terbaru dunia perisian percuma dan sumber terbuka untuk komputer peribadi dan komputer pelayan anda. Setiap 2 tahun Ubuntu juga akan mengeluarkan versi LTS atau "Long Term Support" (Sokongan Jangka Panjang) yang akan disokong selama 3 tahun untuk komputer peribadi dan 5 tahun untuk komputer pelayan. Ini sesuai untuk digunakan di dalam persekitaran aplikasi kritikal syarikat.

Ubuntu juga unik kerana ia dikeluarkan di dalam satu CD sahaja dan ini memudahkan pengguna untuk memuat-turun.

Aplikasi Pemasang Ubuntu juga sangat mesra pengguna dan mempunyai grafik yang sangat mudah dan menarik untuk membolehkan anda menggunakan Ubuntu (termasuk aplikasi kegunaan pejabat dan semua pemacu) dalam masa lebih kurang 25 minit sahaja.
Related Posts with Thumbnails