Introduction
Most Windows users who migrate to Ubuntu end up confused about software installation. They go to a website, download a .tar.gz file, double-click it, and don't see a Next-Next-Next-Finish wizard. This tutorial is intended to introduce you to the preferred methods of software installation in Ubuntu.
Rather than leaving it up to the user to track down installer files and keep applications updated, Ubuntu (like many other Linux distributions) has a software package management system that provides a searchable database of easily installable applications (like an online shopping cart but the software is cost-free), which it will download and install for you with a few clicks.
For those of you with smartphones, it's a very similar process to installing applications using the iTunes App Store or Android Market.
Installing 101: Ubuntu Software Center
The best place to start with this package management process is to use a simple interface for it called
Ubuntu Software Center. (The Software Center is available as of Ubuntu 9.10; in Ubuntu 8.04, there was a similar interface called
Add/Remove.)

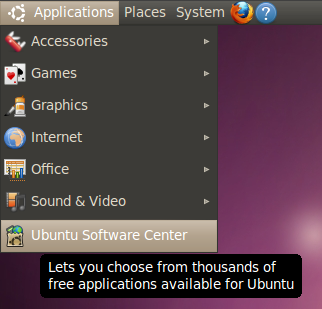
Go to
Applications and select
Ubuntu Software Center.

If you already know what software you're looking for, you can begin typing the name of it in the top-right corner to begin the filtering process. If you don't know, you can also browse by category.
In this case, let's say you're looking for an audio recording and editing program called Audacity.
So after filtering it, click
Install and get prompted to authenticate with your password.

Then after a few seconds, Audacity is downloaded and installed.

Once it's finished installing, it's ready for you to use.
Manual download: .deb
Most of the time, if you need software, you can use the Software Center to install it from the online repositories. Sometimes, software is not available in the repositories, and you have to go to a website to download it. If you are able to download a file with a .deb extension, this is the software package format Ubuntu prefers.

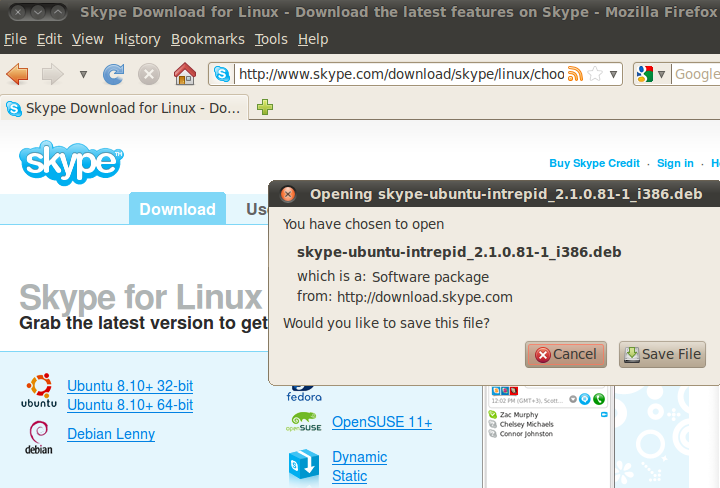
For example, Skype is not in the default Ubuntu repositories, so you can go to the Skype website, and download the Ubuntu package.
Note: Skype doesn't always update their Ubuntu packages. So, for example, in this screenshot Skype lists the installer file as being for Ubuntu 8.10+, but I'm using Ubuntu 10.04. Opera, on the other hand, even if it hasn't changed its browser version numbers will have all the Ubuntu release versions to choose from. I don't even think Google Chrome has version numbers, just separate 32-bit and 64-bit .deb files for Ubuntu. Try to select whichever version seems most appropriate. If you have questions, post a thread on
the Ubuntu Forums.


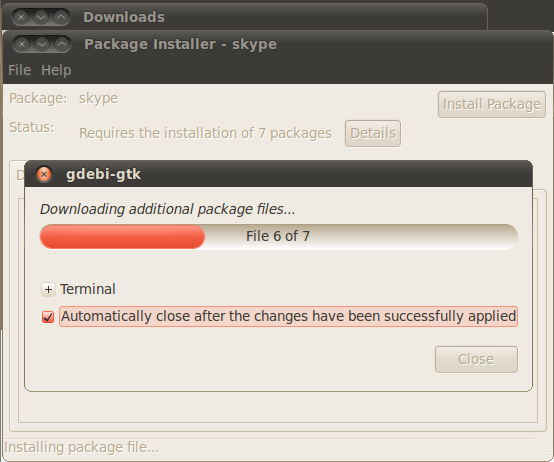
Once the .deb file has finished downloading, double-click it to install it. You'll be prompted for your password. Go ahead and enter it if you trust the source you downloaded the file from.


After GDebi (that's the name of the graphical tool that installs .deb files manually) finishes...

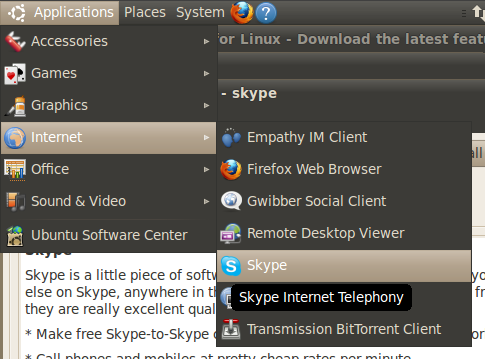
... your application should be ready to use.
Note: as of Ubuntu 10.10 (Maverick Meerkat), double-clicking a .deb file now opens it in Ubuntu Software Center instead of GDebi. The process is still the same, though (just double-click the file).
Last resorts: .rpm and .tar.gz
The preferred way to install software in Ubuntu is to use the package manager, which you can access through Ubuntu Software Center. As we've seen with Skype, sometimes you can also find a .deb for software not in the repositories. But what if you can't find a .deb?
.rpm
If you can't find a .deb, you can try a .rpm. These files are packaged for other Linux distributions (usually Fedora or Mandriva), but there is an application called
alien (which you can install using Synaptic) that allows you (most of the time) to convert .rpm files to .deb.
Read more about this process.
.tar.gz
As a last resort, you can download a .tar.gz file. The .tar.gz file extension indicates the file is a compressed set of files and folders (the compressed files you see in Windows usually have a .zip extension). If you see the .tar.gz, it could be compressed files that have a precompiled binary file, or it could be compressed files that have the source code allowing you to
compile the application from source.
If you have trouble installing a .tar.gz file, you can ask for help on
the Ubuntu Forums.
Links
There are other guides out there that help you understand software installation a bit better.
- Community Documentation on Installing: The wiki gives a thorough explanation of the process of installing software and also includes the Adept package manager available in Kubuntu.
- Video tutorials: A collection of YouTube videos showing the installation process in real-time, often with spoken narration.
- Old Psychocats Tutorial: A very text-heavy explanation of software installation that also includes examples with the command-line way to access the package manager.
Advanced interface: Synaptic Package Manager
I have removed instructions for Synaptic, because I think Ubuntu Software Center is better for beginners, and it's become robust and functional enough so that only those who actually prefer Synaptic really need to know about it. If you are curious about Synaptic, though, I have step-by-step instructions for how to use it on
an older version of this page.